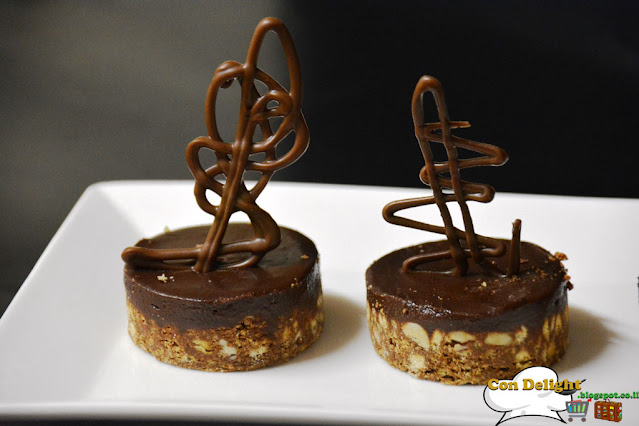
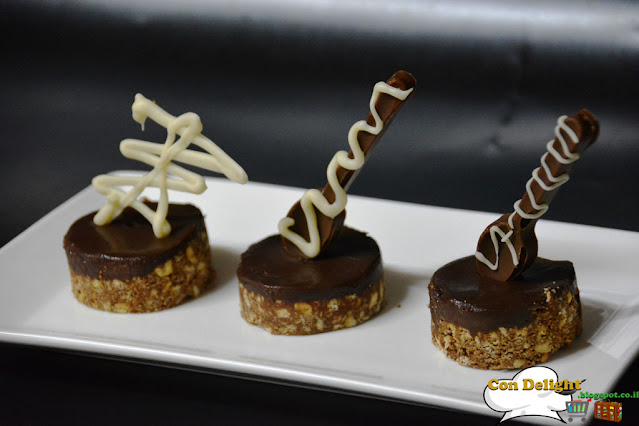
This recipe is a wonderful and easy-to-make petit four dessert recipe that you can serve your guests during parties or make to your family for Shabbos or holidays.
Petit four is a French word that means: "small oven."
In the 19th century in France, there weren't any gas ovens, and the oven bread makers had come with two modes: high heat for veggies and more or low-temperature heat, which is called "petit four" and was suitable for pastries.
The petit fours can come in 3 forms:
1. Sugared - cakes with glazing, éclairs, tartlets, etc.
2. Salted - bite-sized appetizers that people used in cocktail parties or buffets.
3. Dried-baked meringues, macaroons, puff pastries, and biscuits.
Even if someone doesn't like peanut butter, they usually love the perfect chocolate and peanut butter combo. This beautiful individual dessert looks intimidating, but it's not; the combination is delicious. I used peanut butter with chunks and not the smooth kind, but I think next time I will use the smooth peanut butter because not everyone likes the peanuts.
I based this recipe on a recipe from "Marve Latzame" magazine of M. Vaksberger with changes I made, and this mini dessert is suitable for vegans.
No-bake petit-four dessert-recipe: Con Delight, based on M. Vaksberger recipe
I measured using universal cups and spoons
Ingredients for 15 units:
100 gram / 3.5 oz. bittersweet chocolate
1 cup of smooth peanut butter or with chunks
1/4 cup canola oil
1 Tbsp. pure maple syrup
petit beurre biscuits (250 grams / 8.8 oz.), crumbled
Coating:
100 gram / 3.5 oz. bittersweet chocolate
1/2 cup whipping cream/vegan
100 gram / 3.5 oz. bittersweet chocolate*
1/2 cup whipping cream/vegan*
Decoration:
chocolate chips
30X30cm pan (12x12 inch)
3cm ring (1 inch)
Preparation:
1.Melt the chocolate, peanut butter, oil, and maple syrup in the microwave until fully melted.
2.Add in the crumbled petit beurre and mix until you get a unified mixture. 3.Transfer into a pan with baking paper and flatten.
4.Transfer to the freezer to set for at least 30 minutes.
5.Then, melt 100 grams of chocolate with 1/2 cup whipping cream in the microwave, pour on the frozen cake, and flatten.
6. Melt the other batch of chocolate and whipping cream. Pour on top, and spread evenly and smoothly as possible.
7.Transfer to the freezer for at least 30 minutes.
8.Meanwhile, melt the chocolate chips and make chocolate teaspoons using a silicon mold or transfer into a piping bag and pipe crazy shapes. Set in the freezer to harden.
9.Cut circles from the frozen cake and if it is too hard to cut, let it sit for a few minutes outside and then try and cut again.
10.Place a decoration on top of the cake, and you're done!
11.Keep in the fridge.
*You can melt the entire amount of coating together and pour on the biscuits layer. I think if you pour in two different times, it helps get a smoother upper layer.


אין תגובות:
הוסף רשומת תגובה
Thank you for commenting!
Really enjoy hearing from you!
תודה על שהגבתם! מאוד שמחה לשמוע מכם!